Hey guys .
It seems that light typography is taking you all time
so this tutorial is talking about this .
So as always here is what we are going to do .

----------------------------------------------------------------------------------------------------------------------------------
Step 1 :
open a new image choose these colors 2e042b & c914b4
and with gradient tool make a gradient
first make these settings :
And here the gradient I made .
Here I grabed a photo I took for my hands to include it in the file
I Made a selection around it to extract it
like this .
Now resize it
Now to make it smooth I made a blur on it
from Filter >> Blur >> Shape Blur .
like below .
and from Image >> Adjustments >> Photo Filter and choose one of the two colors used
and increase the opacity to 100 % .
Im going to add the text .
well just make sure its all in one line .
Now apply the wave filter
so from Filter >> Distort >> Wave .
and apply these settings
- Number of generators = 10
- wave lenth : Min = 260
Max = 360
- Amplitude : Min = 40
Max = 100
Or what ever it suits you .
and after you scale it and place it in the right position .
it will look like this .

----------------------------------------------------------------------------------------------------------------------------------
Step 2 :
Then apply outer glow blending option to it
foloow these settings .
Now here I made 4 layers from the text layer
- first layer : gaussian blured
- second is an ordinary text layer
- third layer is gaussian blured
- fourth layer is the outer glowed layer
now you see the first two layer is in outer glow blending option

----------------------------------------------------------------------------------------------------------------------------------
Step 3 :
make a groub " new groub "
name it effects because we are going to make the effects here .
make a new layer in side that group
with pen tool make a wavy line like below
then chose a medium size brush with low hardness
then from " path " window right click on it then choose stroke path
a window will pop up choose brush from it and check the stimulate pressure.
remeber the 4 text layers ?! - group them then duplicate the whole group
after that press CTRL+T then right click on it and choose flip vertical
and move it a little to the right.
Now from the effect group make a new layer
then choose the brush with a little big size and make a spot of white light in front of the hand .
then with the eraser tool erase some of it
choose any brush you like.
then apply Filter >> Blur >> Gaussian blur
again apply Filter >> Blur >> Motion blur
make the angle = 0
and a suitable value
Now apply a blending option : Outer Glow
with this values .
Now make a new layer and with pen tool
make with it these wavy lines
like below
then choose the brush and choose a small size with a small hardness .
and then select the path line from path window
and right click on it then choose stroke path like before
Now you could choose another suitable brush and repeat the previous steps .
then make another lines again then with the previous brush make a stroke path like before
but this time blur it a little
then apply an outer glow blending option
like below .
again make a new layer choose a selection tool and select around the hand like below with high feather
then add a cloud render
Filter >> Render >> Cloudes but before that choose the very previous two colors .
now CTRL+D to eliminate the selection
then reduce the fill for that layer .
sorry for the increased number of layers , but just that final effect
Make a new layer
choose a suitable brush with suitable size
the with the pen tool draw lines around the hand like below
and stroke path .
to apply a good effect to it
duplicate that layer then place it under the original layer
then Filter >> Blur >> Shape Blur ............choose the circle
Apply an outer glow blend option to it
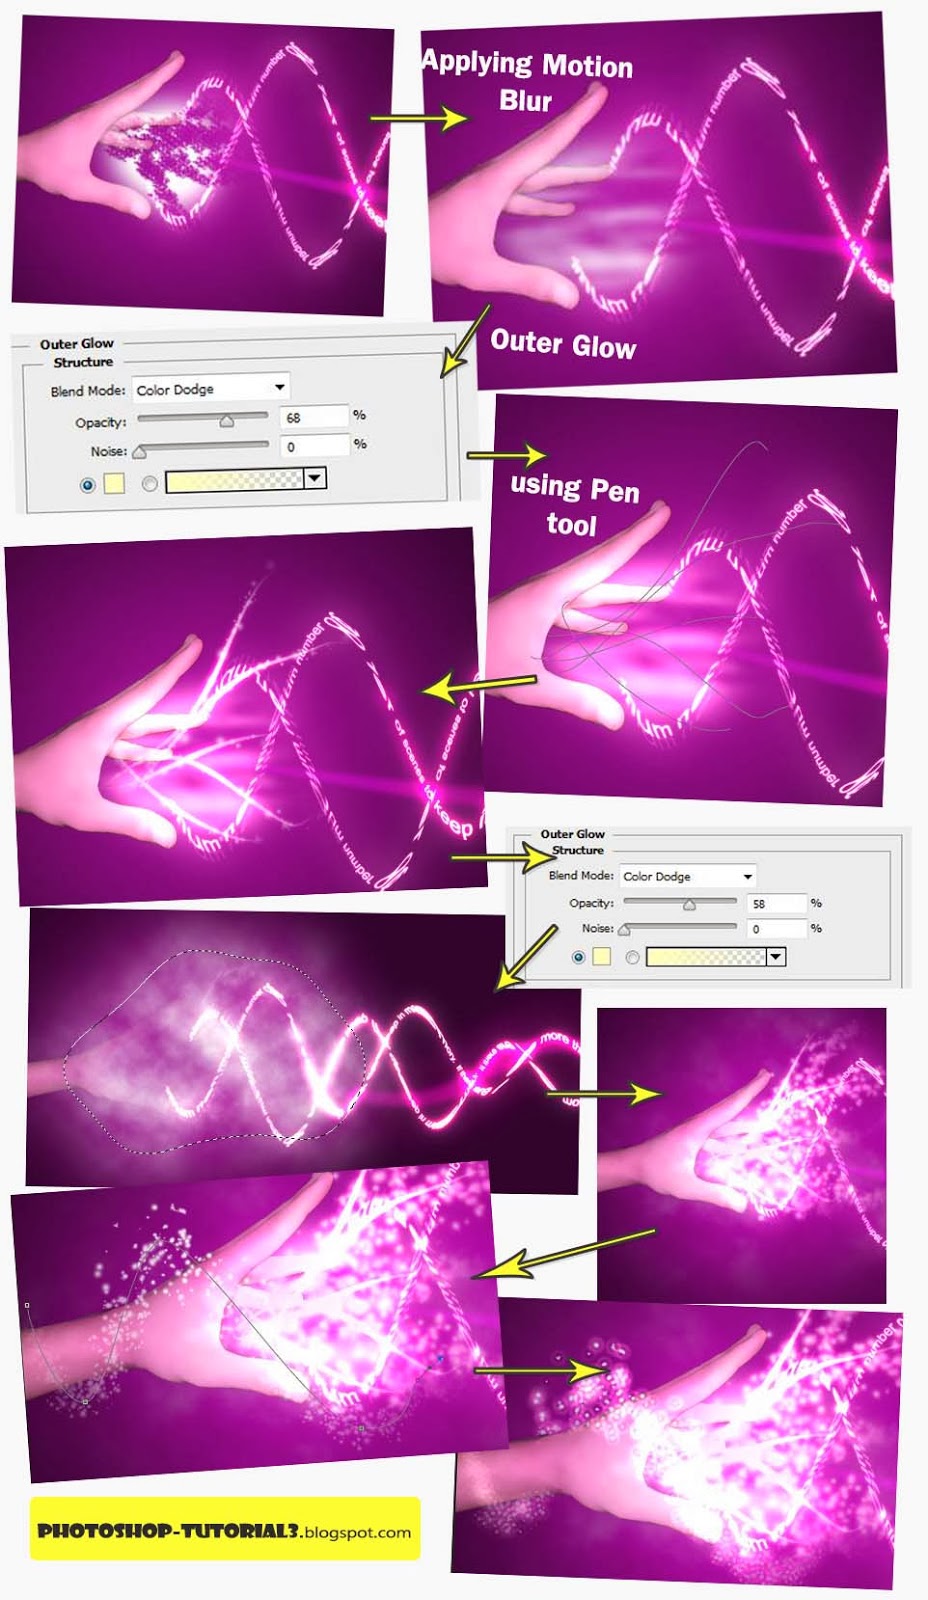
here is another way to make it
you can let your prain blow up with ideas .
Thank you .
----------------------------------------------------------------------------------------------------------------------------
Want more !!
Go down and join our website to
have all recent posts or click Here
or subscribe to our newsfeed : Here
Thank you
---------------------------------------------------------------------------------------------------------------------------


You stuff is really good, thanks !
ReplyDeleteyou are welcome
ReplyDeleteIm trying to make the content great as much as I can
Glad I could help
Looking for Best MCA college in ghaziabad, then there is only one college that can fulfill your all expectation. That is IPEM College.
ReplyDeleteMCA college in delhi
MCA college in Noida
Top MCA College in Ghaziabad
Do you want an awesome, astonishing and stunning book cover for only 5$? It's available exclusively on Fiverr!
ReplyDeleteGo check it out!!
www.fiverr(dot)com/shayonkhaled/professional-unique-ebook-cover
Replace the dot with a fullstop (.)
Thank you for your valuable time! :)