Hey Guys
Here Im gonna show you how to make a great Pokeh effect
really really great
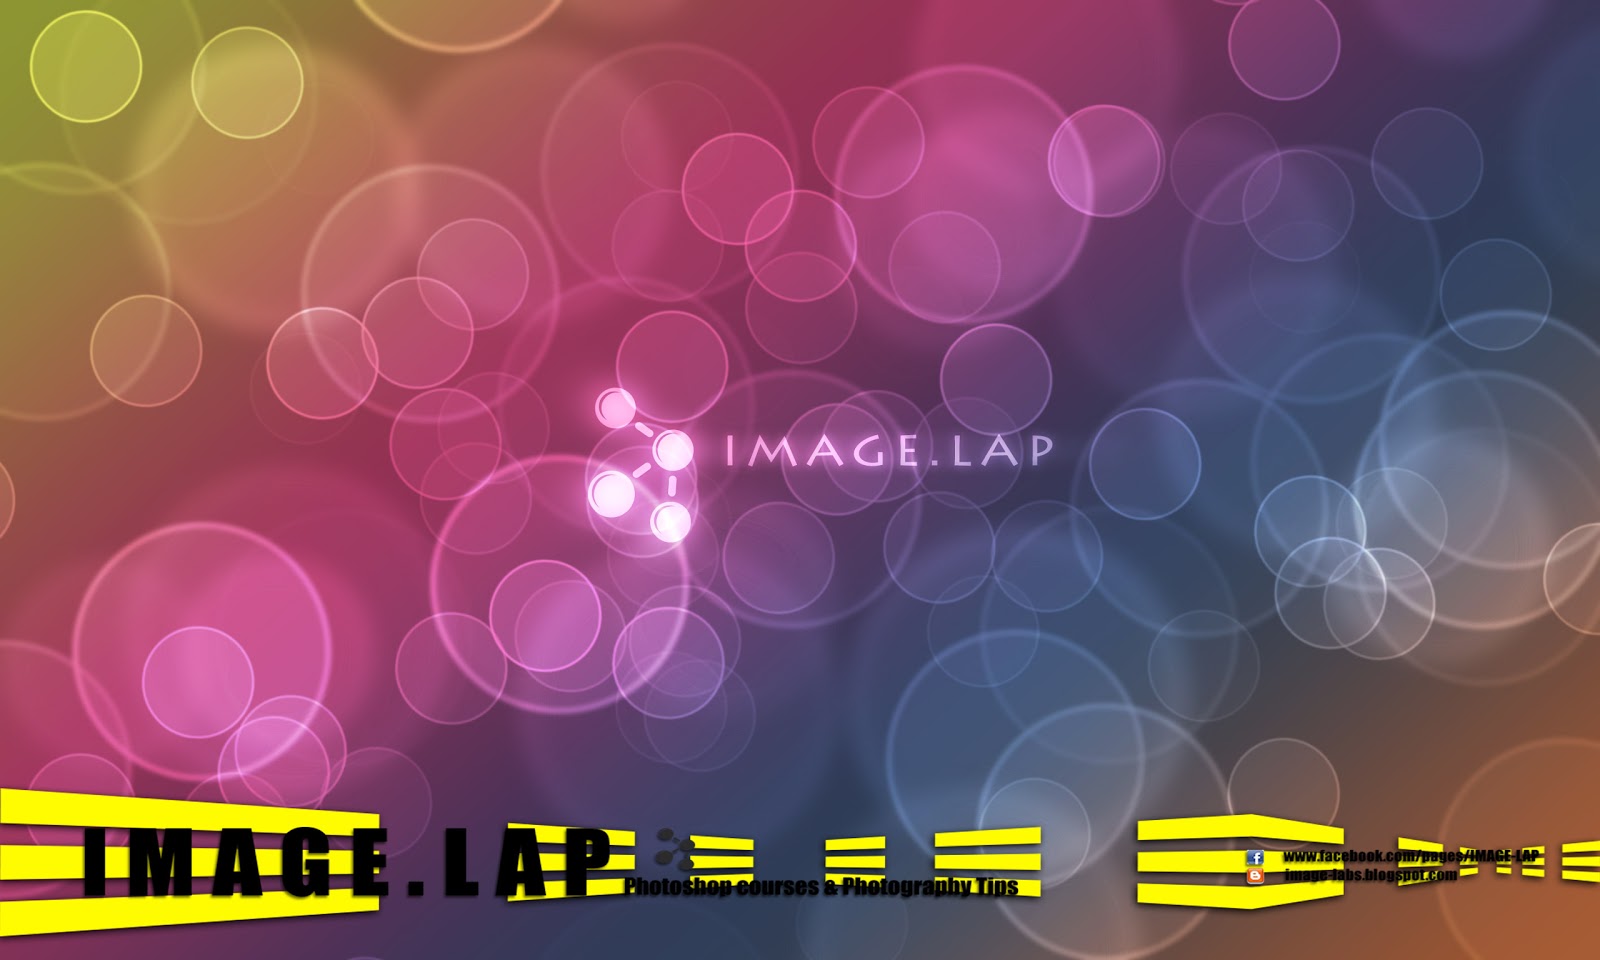
so as always this is the final Result

a great effect used widely on the internet
lets begin :
------------------------------------------------------------------------------------------------------------
Step 1 : " Making the Pokeh Circle "
Make a new layer and fill it with that color 262626


and that will be the result

Now Hide that layer
and make anew layer " transperent "
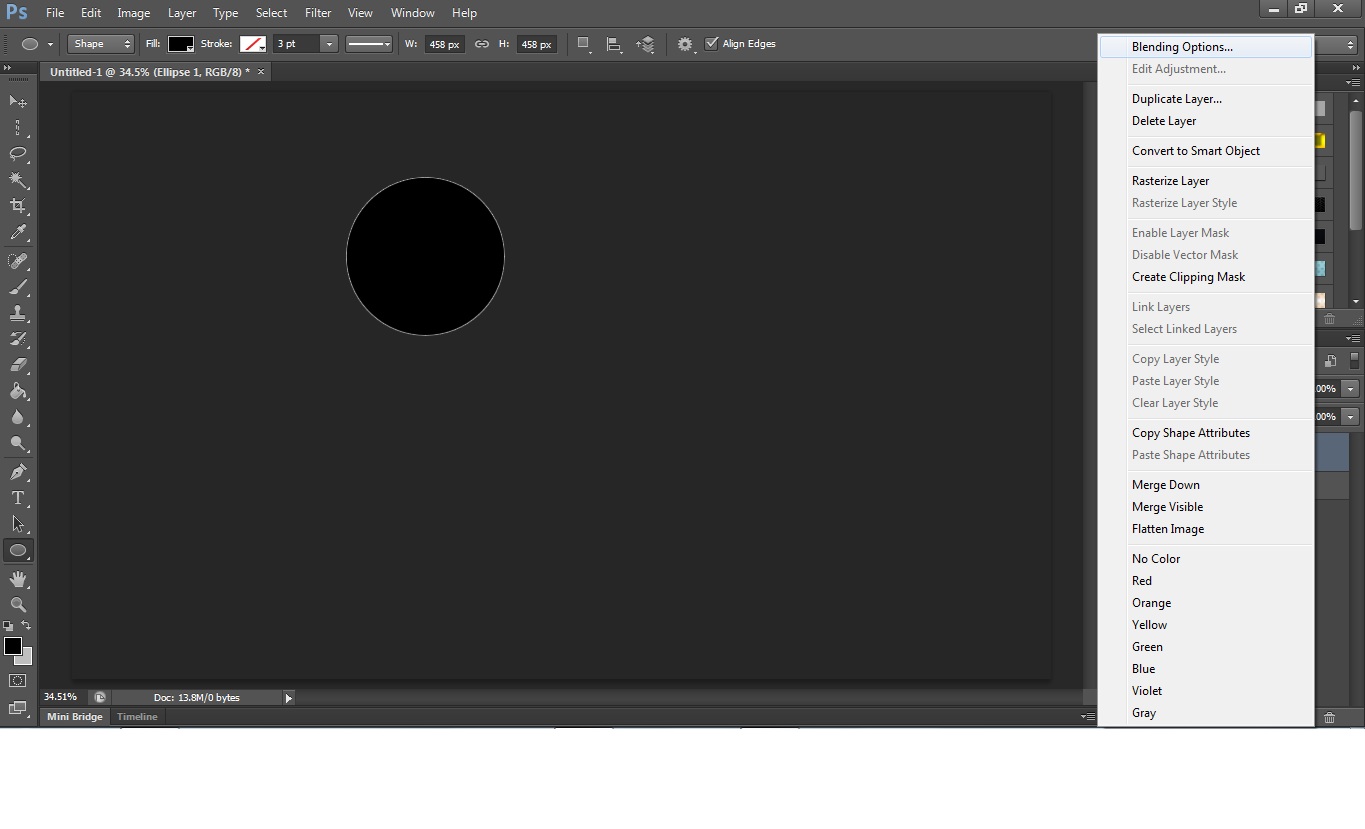
and make a circle shape with any size with black color
you will hide the past layer but i didn’t ,it wont change any thing but its better to hide it
from blending options reduce fill opacity to 50%
and move to stroke with size 10 px , position inside , black color


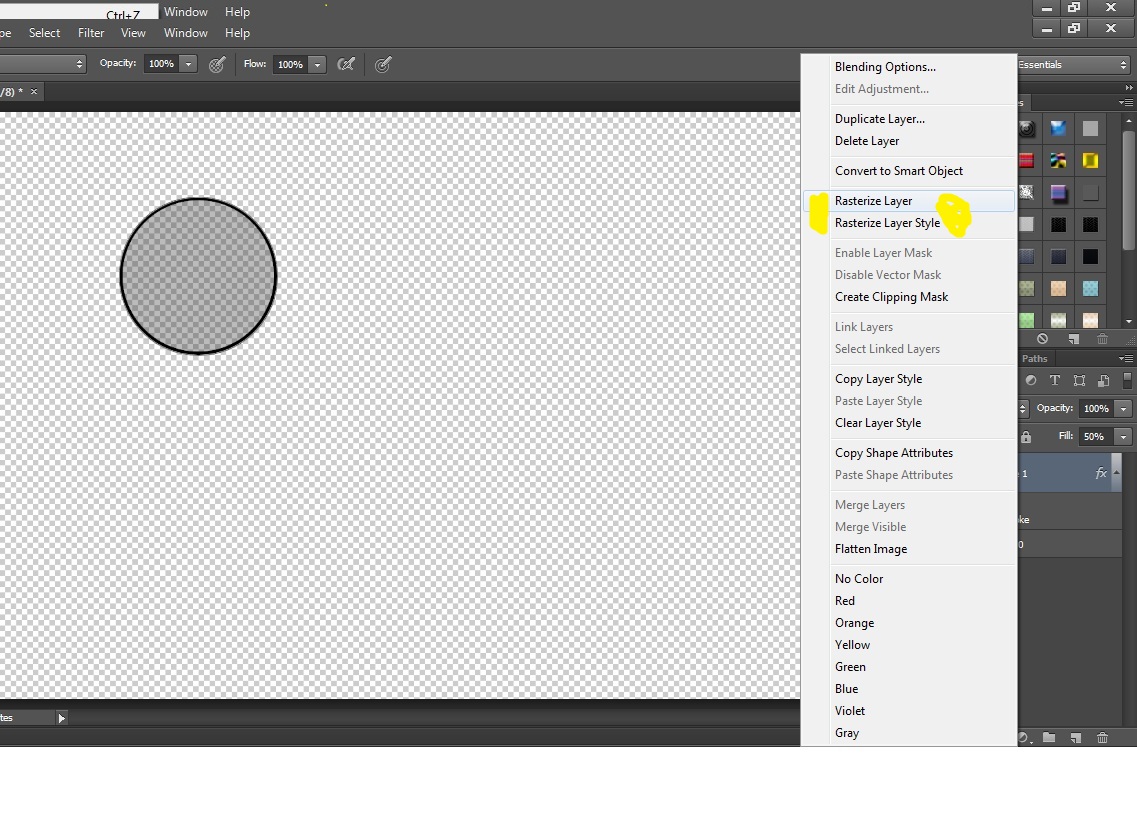
then right click on that layer
and choose to rasterize layer & rasterize layer style as the photos show

it will be like that
now head for the layer and CTRL+click on the above yellow box to select the circle
then from edit choose define brush presets
change the name you want
click ok
now go to windows then choose brush presets
or simply choose the yellow colord button
and do as follow

now we have made the pokeh brush we will work with
and step 1 is over
------------------------------------------------------------------------------------------------------------
Step 2 : " making colored background "
now make a new layer and fill it with any color , doesnt matter
and go to blending options
and choose gradient overlay
then do like the photo
remark : you can decide wich colors you will work with or any gradient you
make
and if you dont wanna make you can find alot of grades on this section


And it will be like this

and ..... done with the background
------------------------------------------------------------------------------------------------------------
Step 3 : " making the pokeh effect "
make a new folder in layers window by pressing that button
name like pokeh or what ever you like
then make a new layer
and change its blend mode to either vivid light or overlay thats your call
now grab the brush tool
and make some circles , small quantity with a bigger size like 600 px or 500

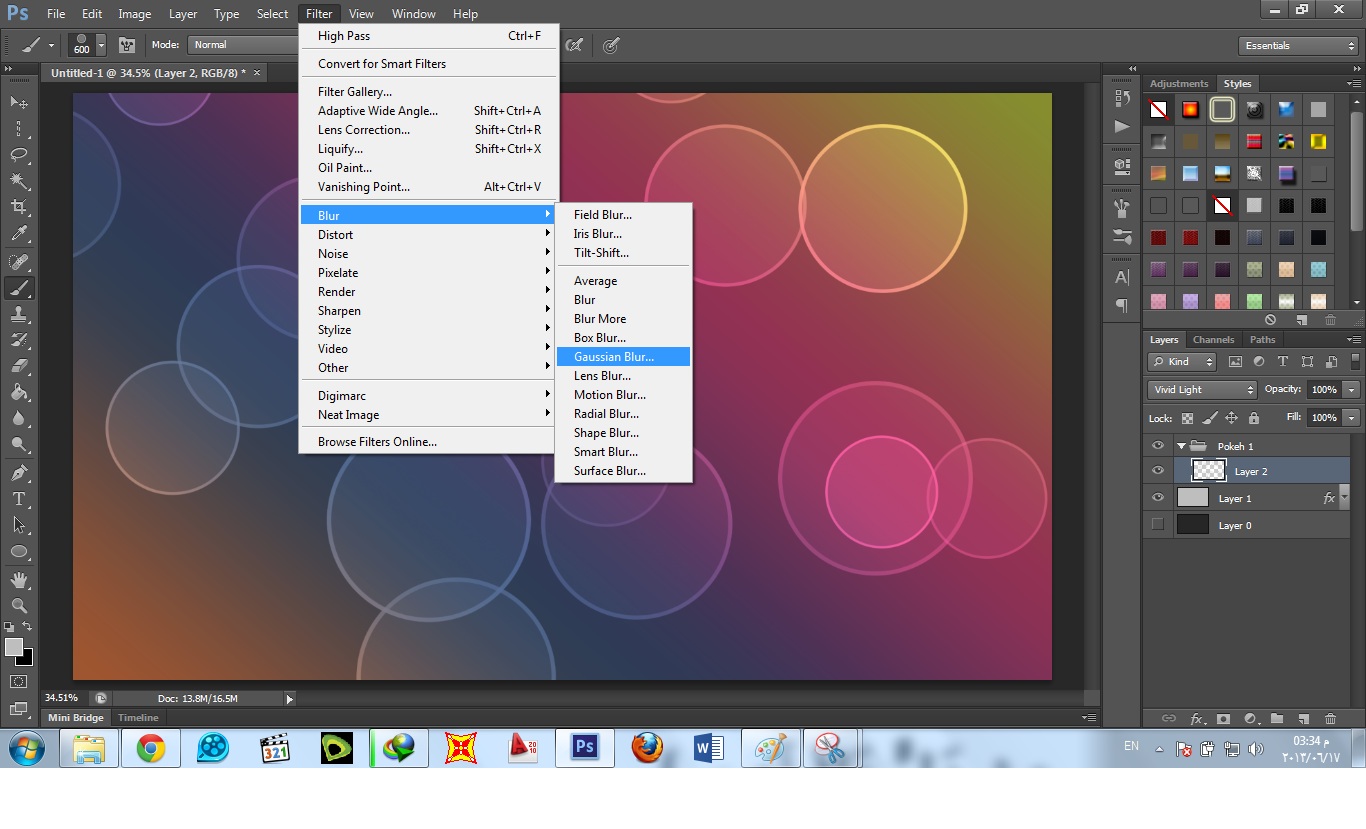
now from filter choose blur then gaussian blur
and make it 20 px

after you did that it will be like that

now make a new layer
then with the brush tool paint another set of circles but with smaller size and bigger number
after you do that
go to filter then blur then gaussian blur
and set the number to 4 px
then make anew layer
and do the same
but smaller size and bigger number
it will be like that

aggain from filter go to gaussian blur
and set it to 1 px

then ok
and that was it
a great effect
now all you have to do is placing your title or logo
do some effect and it would result as below
you can change the whole color system
and let your brain blow up with ideas
thank you
------------------------------------------------------------------------------------------------------------
Remarks :
- PLZ share and comment so every body benefit .
- Also like our page above and subscribe to get the latest Posts .


0 Comments:
Post a Comment
Dont be afraid to add a comment. I will respond , I promise